How to scan a document from a printer to a computer using the Scanning Wizard? Scanning documents using special software and Paint.
Transferring information from an MFP or printer to a PC is possible in several ways, differing in the use of various software and additional files. The general principle of operation of all methods is almost identical, with the exception of a number of nuances. Knowing them, you can get the highest possible quality of the final image with the ability to adjust text or photos according to specified parameters.
After connecting a printer from any manufacturer, drivers are installed on the PC. To do this, perform the following manipulations:
If you are using a driver disk, you must insert it into the drive and click on the “ Further" After this, Windows itself will find the necessary drivers and install them.
After connecting the DeskJet universal printer or an analogue to the computer, making the specified settings for installing drivers, log in through “Start” to the “Control Panel”. In the search section, enter the concept “Scanner”. Several links will appear on the screen from which you can select “ View cameras and scanners».

The easiest way to transfer files from a printer to a PC is to learn how to use this program. Paint is included in the standard set of options for the Windows operating base. Step-by-step instructions are given below:

This algorithm is relevant for Windows 7.
Any printer or MFP comes with a disk with drivers and software specially designed for a specific device model. Installing such programs makes it possible to obtain the most effective interaction with the device along with high quality parameters.
Actions when using special software:

Some standard applications do not save processed pages. They just open them in the image view section. In this case, the key combination “Ctrl” and “S” will help to set up the process correctly, after pressing which you select the folder to store the document.
To simplify the operation, you need to choose software with automatic saving of information, proven by time and users (Adobe Reader or DjvuReader). They allow you to display the format for the image and select storage. The device can copy a specified file with a black outline, which must be trimmed using an editor before saving to a PC. The optimal resolution is 150 dots per inch, for official documentation - 300. The configuration of the final file is influenced by the format for saving the scan (jpg, bmp, tif).
Share.In modern conditions, you can scan a document or picture from a printer, that is, create an electronic copy of it, using various methods. One of them is to use a printer with built-in scanner capabilities.
Before you start scanning, you need to make sure that the printer connected to your computer has the properties of a multifunction device (MFP). It is not possible to create a copy using a regular printing machine. So, scanning from a printer to a computer begins with the correct connection of the MFP to the computer via a USB port, followed by the installation of hardware drivers, which is performed automatically from the disk or the operating system driver installation wizard. A driver disk is included with the device.
Once installed correctly, a notification appears in the lower right corner of the desktop indicating that the device is ready for use (in Windows). 
To scan a document to a computer from a printer, you need to follow the following algorithm (the method works in Windows 7/8/10):

This procedure can be done in a different sequence (it happens that the wizard does not start automatically when you press a button on the printer). Then it can be launched from the start menu, called “ faxes and scanning«. 
Then continue working with the application.
Most Windows users are familiar with the simplest graphical application Paint (installed automatically during installation of the operating system). This editor can not only process images, but also scan photos to your computer.
There is an option in its menu receiving pictures"From a scanner or camera." 
Using it, we get a window with selection of parameters procedures (you can scan in black and white, color, adjust the quality of the scanned document). 
In general, quickly, conveniently and everything else, you can continue editing the image right there in Paint, saving it in a convenient format. 
It happens that the functions of standard scanning programs are not enough. For example, you need to recognize scanned text, save the image in a different format, or use special quality settings for the resulting image, and process it. In this case, you can resort to specially developed scanning programs with advanced functions.
To summarize, we conclude: you should use one or another scanning program based on your goals and the result obtained. The standard methods are suitable for the average user, but specialists and professionals will need additional utilities. Good luck with your choice!
“Scanning” documents and photos on your phone is a useful feature. Luckily, there are very simple ways to scan documents.
Of course, a dedicated scanner will still be better if you often need to scan a large number of documents, but using your phone as a scanner will also work if you only need to scan a few documents. Here's what we recommend for Android.
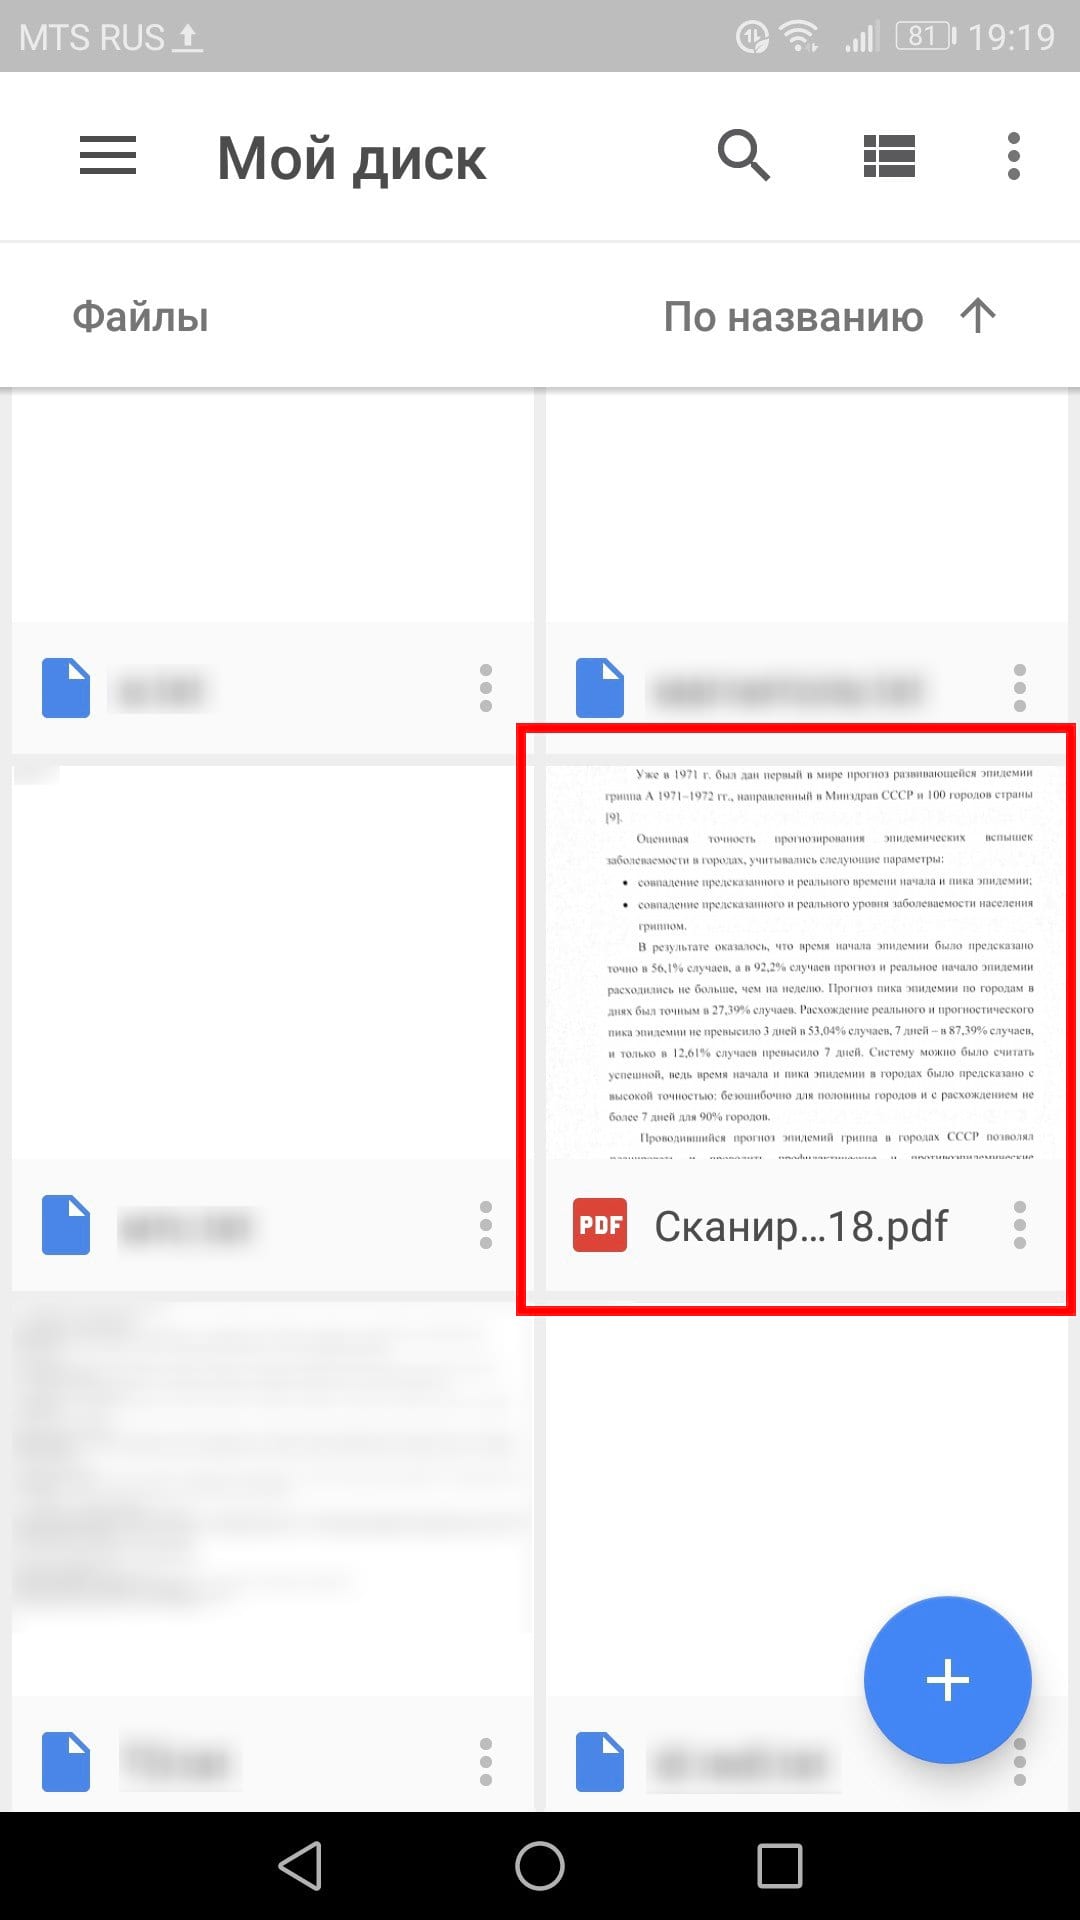
If you are using an Android device, then the best way to scan documents is the Google Drive app, which is installed on almost every Android device.
You can scan documents directly from Google Drive by clicking the "+" button in the bottom right corner of the main screen.
From the pop-up menu, select Scan.

He may ask for permission to access the phone's camera. Click Allow.

When you are ready to scan a document, position the document so that it takes up as much of the screen as possible and press the blue button. You can also use the flash by tapping the flash icon next to the capture button if your device has a flash installed. If your device does not have a flash, this option will not appear.
After scanning the document, a preview will appear immediately. Don't worry if most of the document is cut off when you view it. Click on the corresponding icon to select the area you want to save.
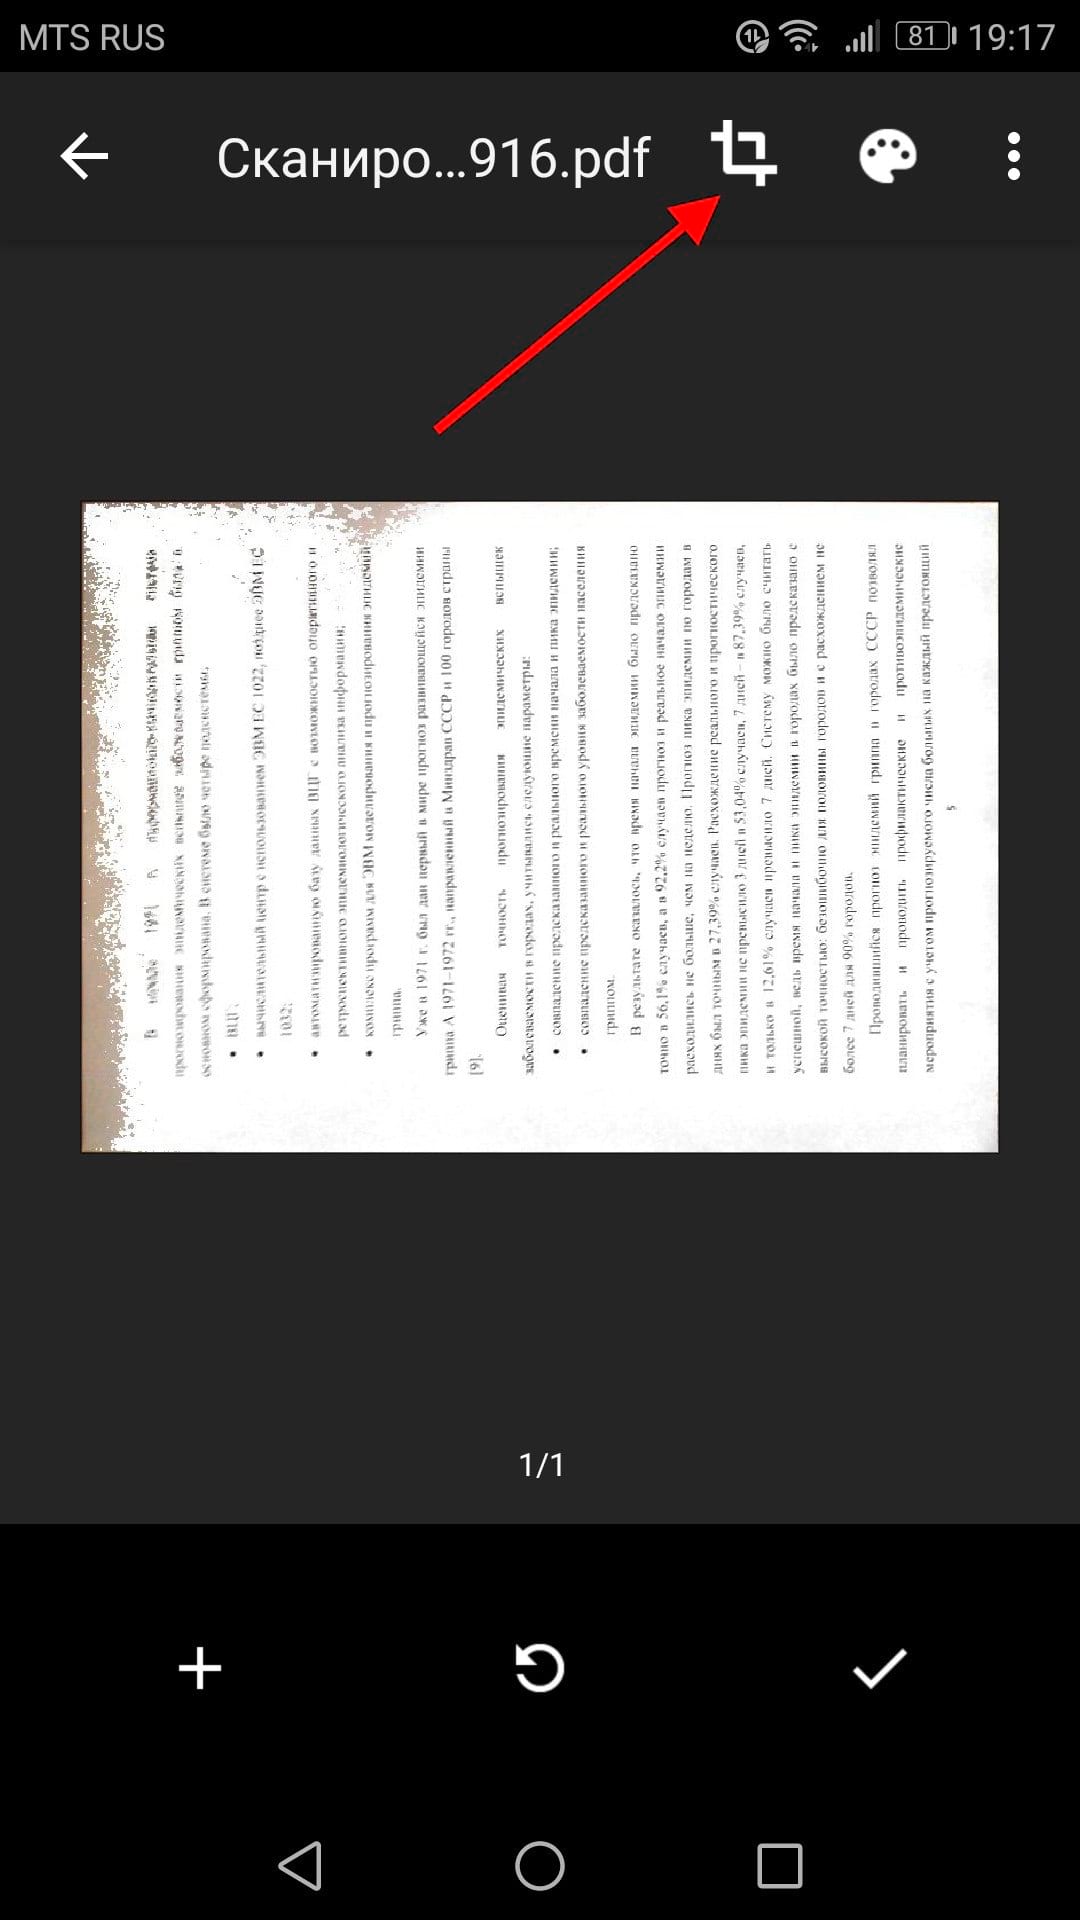
Touch, hold and drag the dots to change the area that is scanned.
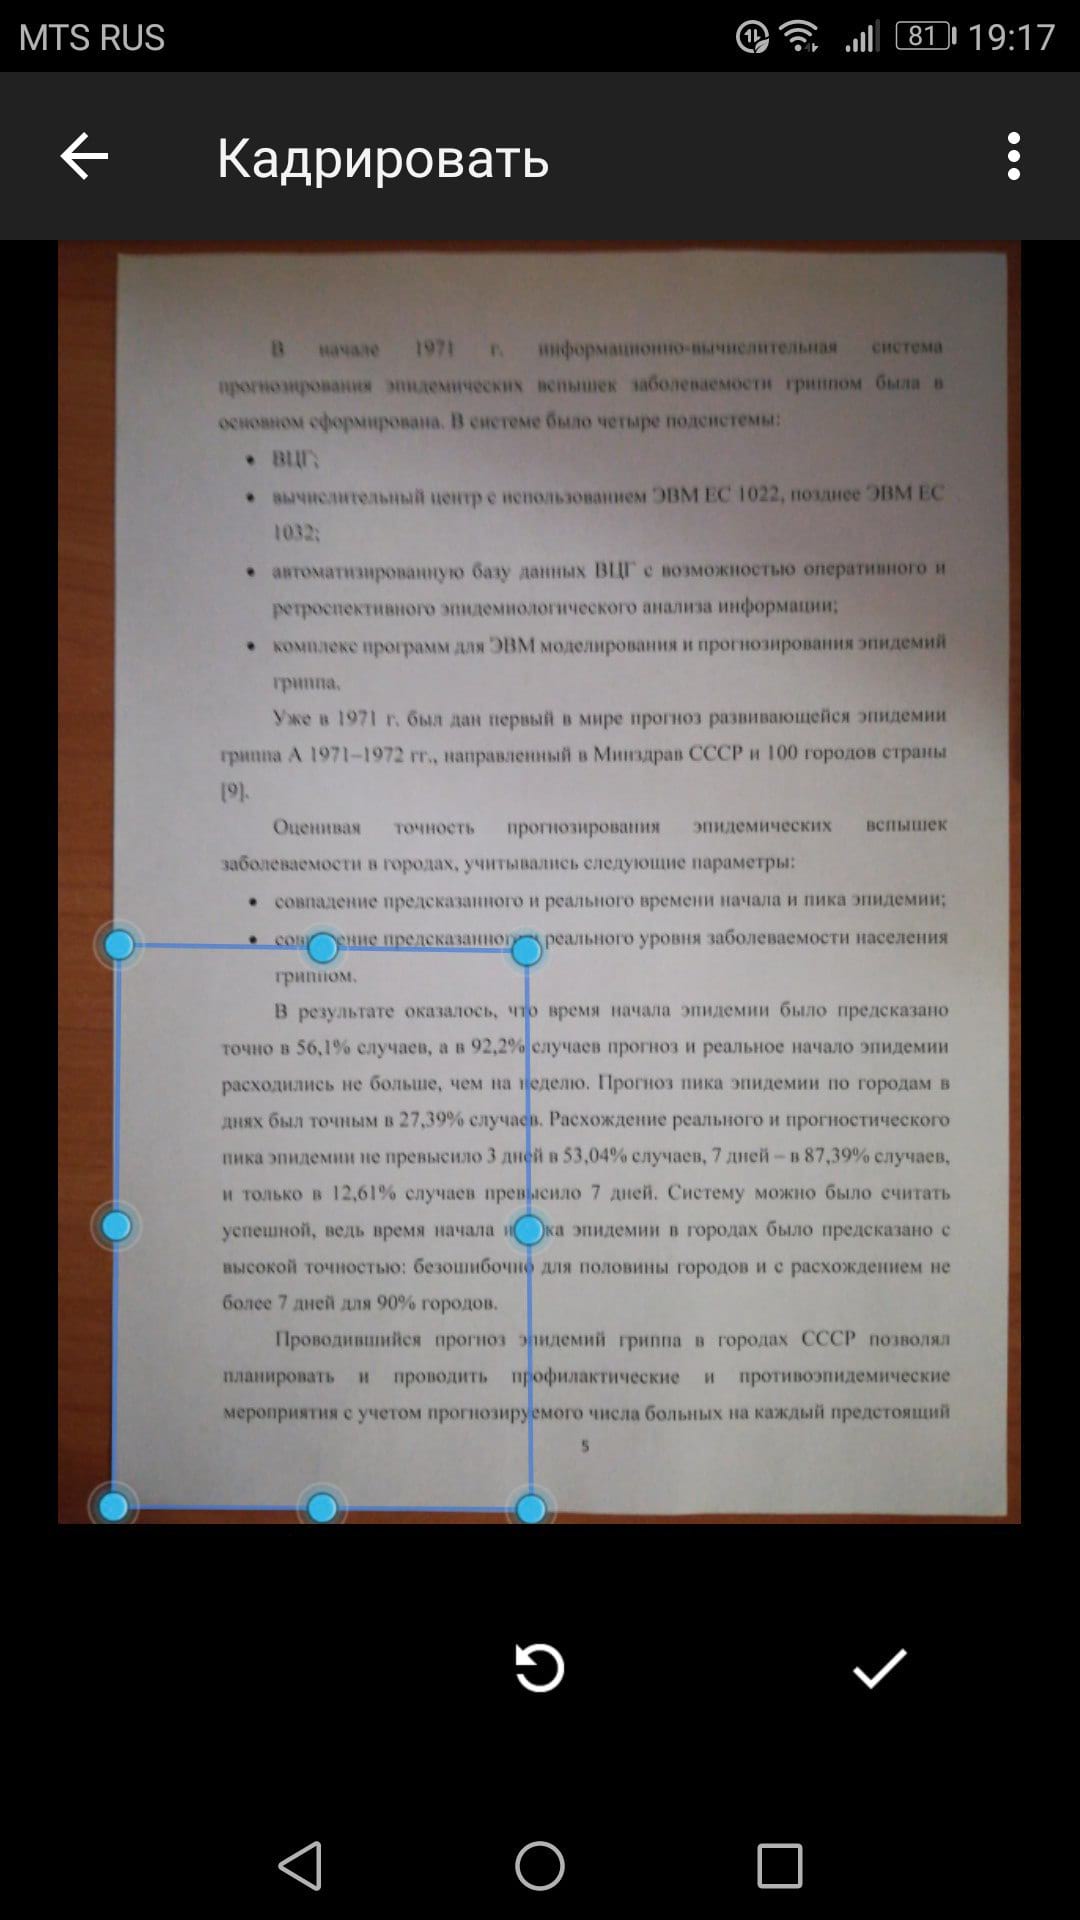
When finished, click on the checkmark in the lower right corner of the screen.

You have three options immediately after scanning:

You can also make minor adjustments after scanning. For example, clicking on the palette in the upper right corner will allow you to change the scan color selection and match it to a specific document type. By default, the scanner automatically selects the one it thinks is best.

Finally, the three dots in the top right corner will allow you to delete, rename, and rotate the scanned document if necessary.
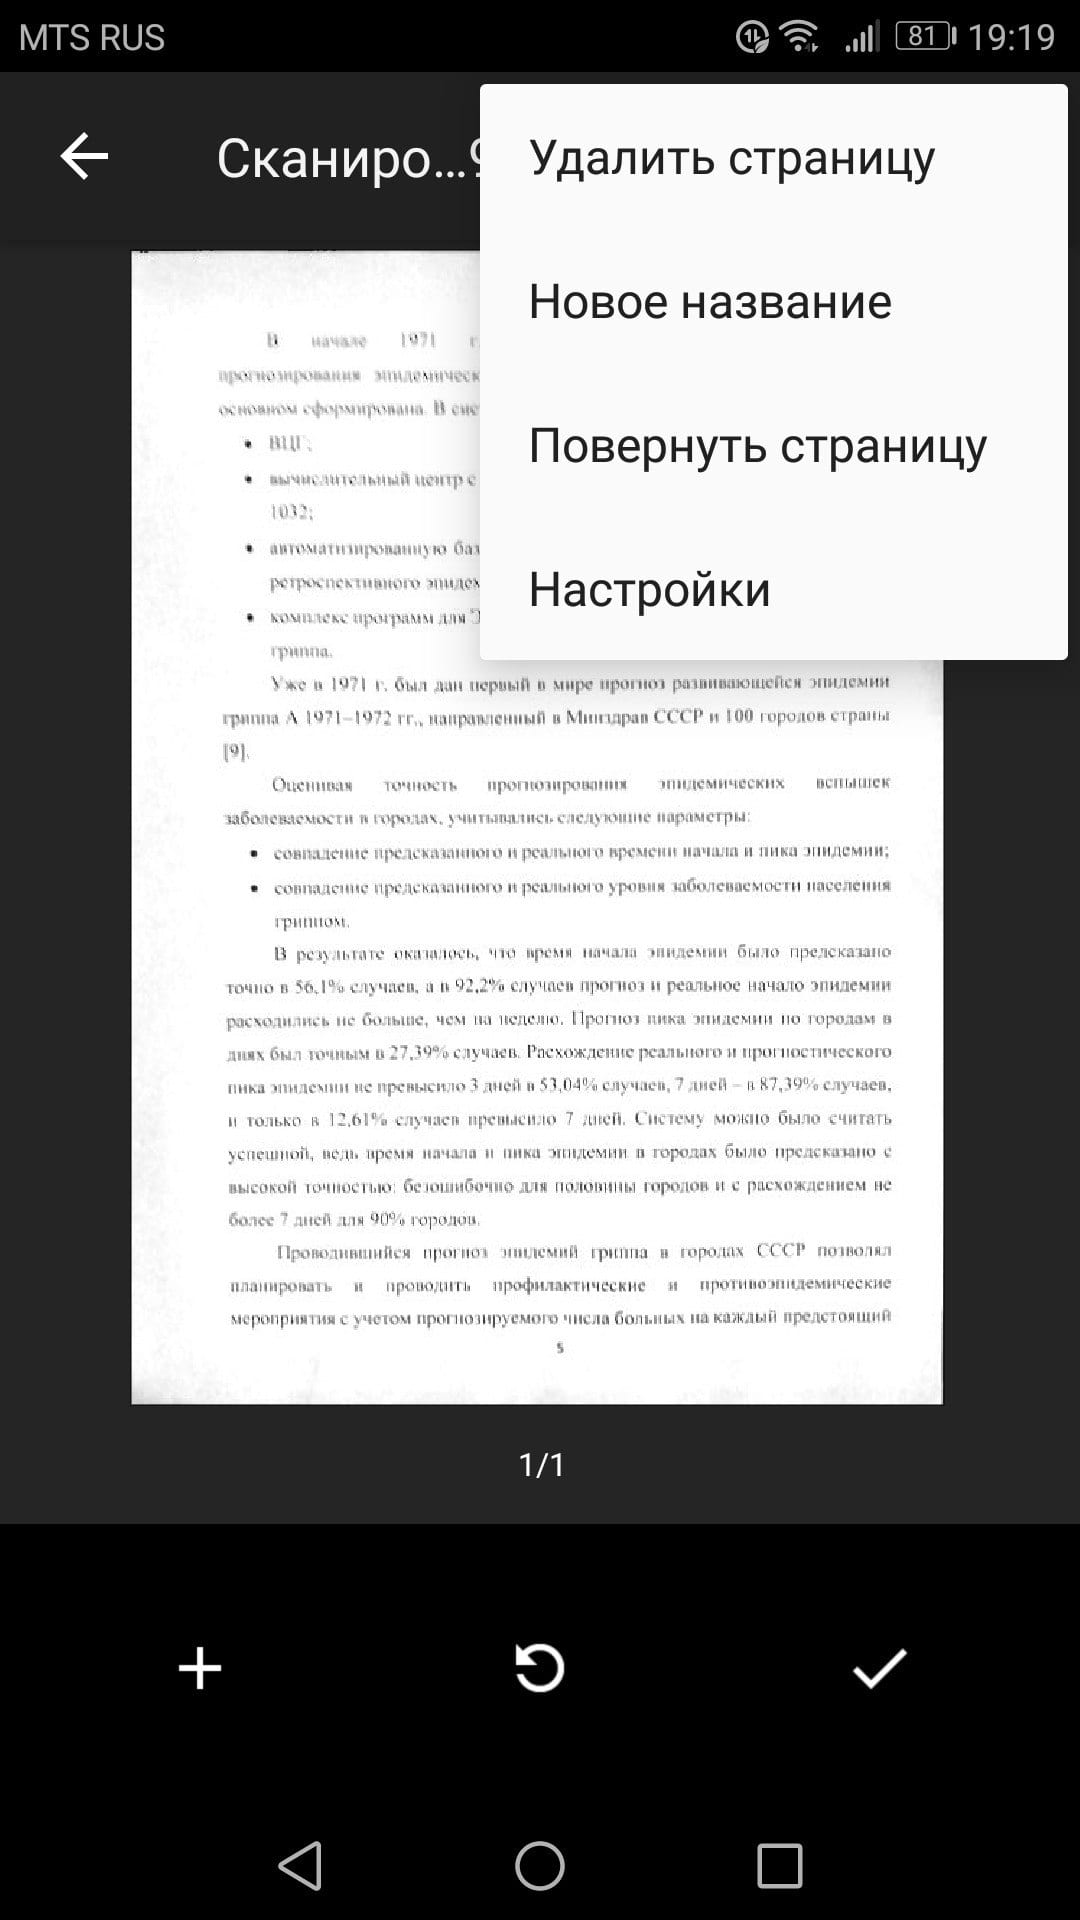
Scanned documents are added to Google Drive in PDF format, and names are added along with the word "Scanned" followed by the date and time. You can move, rename or delete any of the scanned documents by clicking the three dots next to the file name.

You will then convert this scanned PDF into a document, which you can then edit or export to Microsoft Word.
A scanner and a printer are completely different devices with opposite functions. A scanner is designed to convert information from an external medium (book, magazine, documents) into digital form, and a printer, on the contrary, is used to output digital data stored on a computer onto paper. A very common question you hear is how to scan a document onto a computer from a printer. This is due to the widespread availability of MFPs on the market - multifunctional devices that can photocopy, print and scan. But these devices are called “printers”, since they are most often used to print information.
Scanning devices are available for home and professional use. Business machines (Xerox DocuMate 4790/4799) are distinguished by high operating speed, excellent scanning quality and reliability, as they must be used constantly. Devices intended for household use are subject to significantly lower requirements, but their scanning quality is also high (Epson Perfection V19).
Advice! You can purchase the scanner as a separate device (Brother ADS1100W) or as part of an MFP (Kyocera FS-1020MFP, Samsung SCX-4200, Samsung SCX 3400). However, in most cases it is not practical to buy only a scanning machine for home use.
Therefore, MFPs are most often chosen for home use. The most famous and best-selling products are those from Canon and HP (Canon MF3010, HP Deskjet 1510, etc.).
To use the scanner, you will need to connect the device to your computer and install special software. To connect the device, you need to remove it from the box, remove all protective shipping stickers, install it on your workplace and connect it to the computer with a cable. Usually connection occurs via a USB port, less often (if a scanner is purchased) – via a SCSI port. If your PC does not have a SCSI connector, you will need to buy an adapter to USB.

The USB cable for connecting to a PC has different plugs: on one side it is normal (type “A”), on the other side it is almost square (type “B”). The first one is connected to the computer, the second one is connected to the MFP, it’s impossible to make a mistake.

Attention! A cable for connecting to a PC is very rarely included with an MFP, so it will need to be purchased separately. This is due to the fact that the device can be used autonomously. For example, you can photocopy documents without connecting to a PC.
After connecting to the PC, you need to plug the power cord into the outlet and turn on the device.
A message will appear on the monitor screen notifying you that a new device has been connected. If the MFP or scanner has Plug-and-Play technology, the computer will automatically recognize it and install drivers. Otherwise, you will need to do this procedure manually. Usually a driver disk is included with the device, but if it is not there - you will have to download them from the Internet.
After the drivers are installed, you need to open the device manager and make sure that everything is done correctly and the new hardware is recognized and correctly displayed in the list.

Now you can check the device. If it is an MFP, you need to print or photocopy some document, for example, make a copy of your passport. You won't be able to scan through a printer yet. To use the scanner, you will need a special program with which data from physical media will be digitized and transferred to a computer.
As a rule, most office equipment manufacturers produce their own software for scanning documents. U Canon is MF Toolbox, for HP is HP Scan etc. You can download it on the manufacturer’s official page. By specifying the device model, the user will receive a list of software available for the equipment and a link to the latest drivers.

If the software from the manufacturer is not suitable for some reason, you can find a lot of additional software on the Internet designed to work with scanners. This Abbyy Finereader, Vuescan, Winscan2PDF and many others. Some programs are paid, but with a trial period, others are absolutely free. If desired, each user will be able to choose the best option for themselves. You can download the appropriate software on the developer’s website.

Own Windows OS also provides software for working with the scanner.. This is the Scanner Wizard system tool in Windows 7, 8 and 10, the Scanner application for Windows 10 and 8.1, as well as the standard Paint program.
The easiest way to scan images is to use the Scanner Wizard available in the Fax & Scan app. To start digitizing images, you need:


After the device is completed, the digitized image can be saved on a computer, sent by email, printed, etc. And you can find this file, by opening the “Documents” folder, and in it – “Scanned Documents”.
For best results when scanning text documents It is recommended to use special software from the device manufacturer. The process will be approximately the same everywhere. Differences, if any, will be insignificant. The algorithm of actions is as follows.
To scan images, you can use the built-in capabilities of Windows - scanner wizard or Paint. To receive a photo from a scanner through this application, you must:


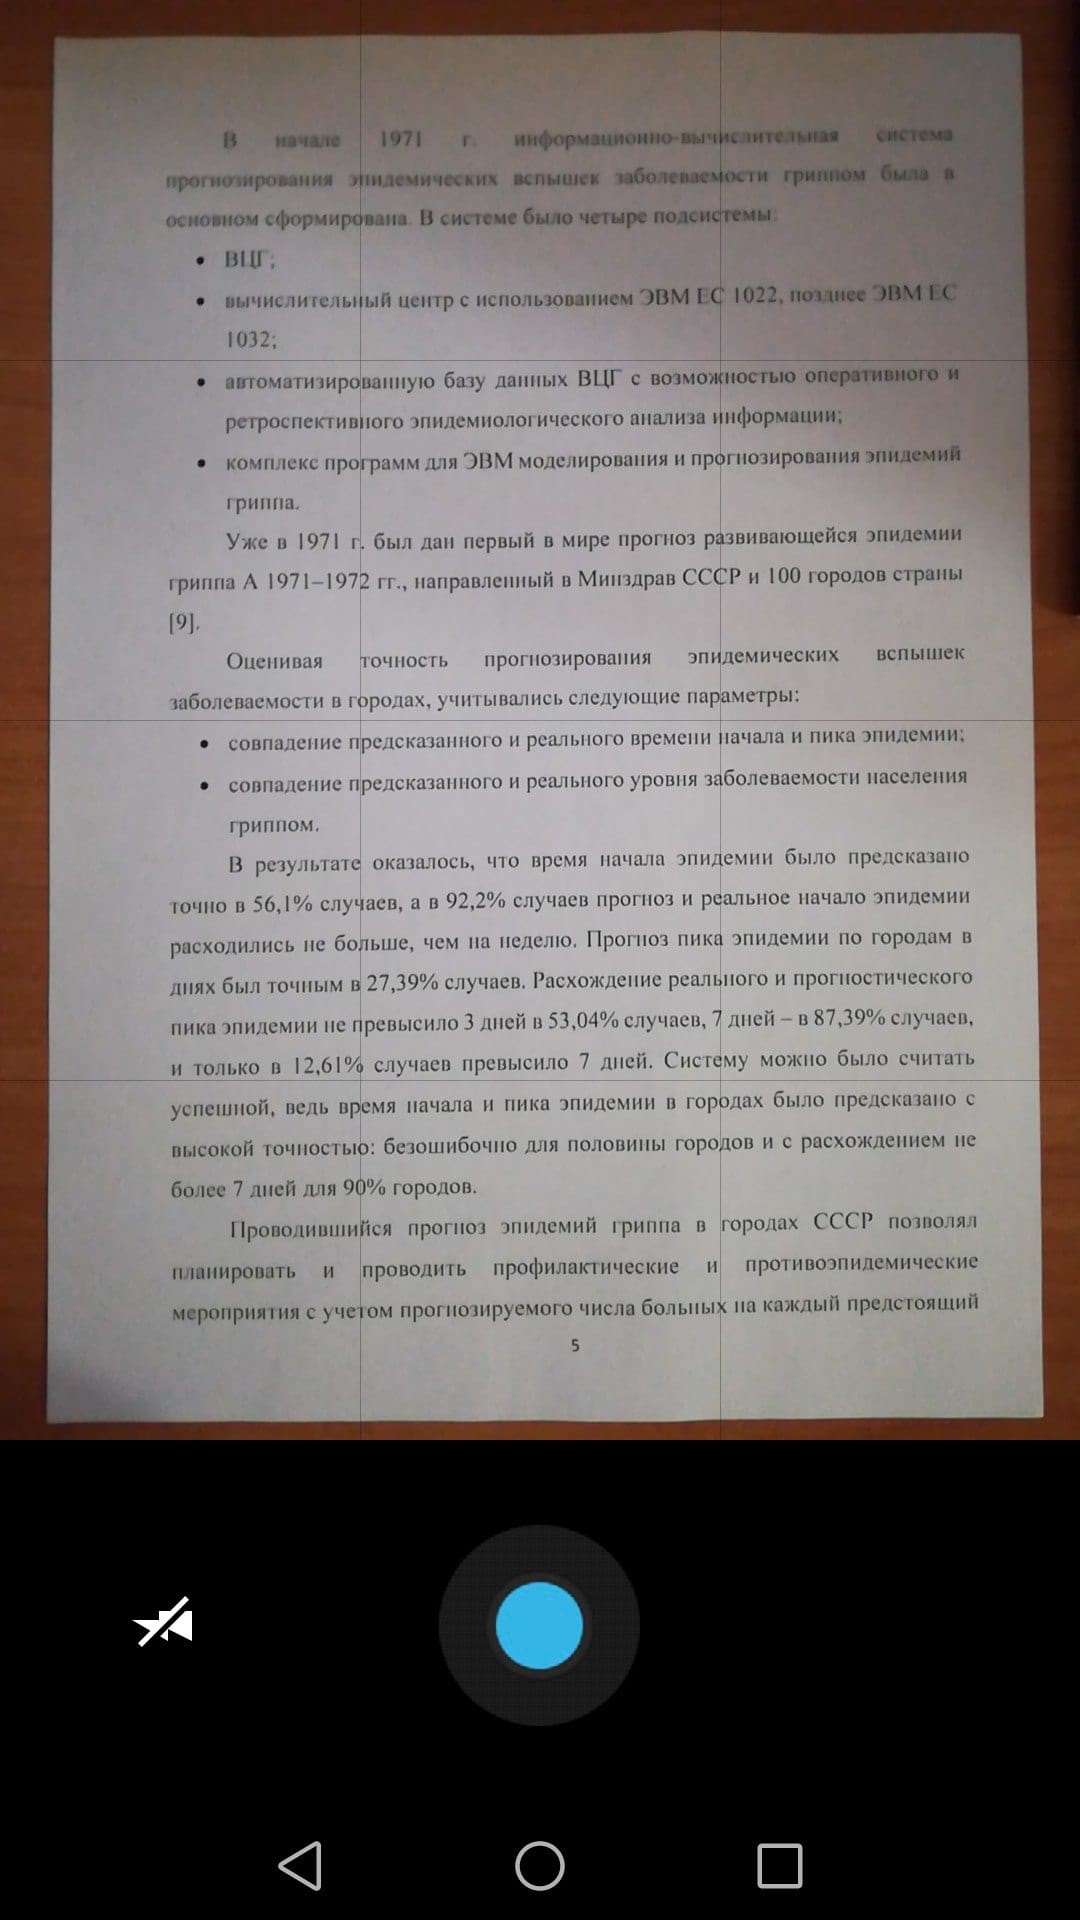
Official documents scanned onto a computer must be clearly visible and readable, so they need to be digitized in the highest quality.
Advice! For better quality, it is recommended to use ABBYY Fine Reader or other programs with similar capabilities. The scanning parameters should be set to “Grayscale” and resolution to “300 dpi”. While the scanner is operating, you can press the cover with your hand to better copy information.
When previewing, you need to make sure that all letters are distinguishable and read correctly. Only after this can you save the image. It is worth keeping official documents in bmp or tif formats.
Some programs from scanner and MFP manufacturers do not save digitized images, but only open them using viewing applications. In this case, the combination “Ctrl+S” you can select the path where the file will be moved. And programs such as Adobe Reader can automatically save the scan. To do this, you need to specify the format and folder for placing the images once; in the future, the application will do everything on its own.
Important! When scanning images, you need to set the resolution to 150 dpi, for documents - 300 dpi. The size of the saved file will depend on the selected format. The smallest size is Jpeg, the largest is bmp and tif.
The choice of application for scanning documents should be in accordance with the needs of the user and the result that he wants to obtain. So, to work with texts, you can download Scanitto Pro: the program recognizes the text and translates it into txt, docx or rtf formats, which makes it possible to open the file in Word for further editing. WinScan2PDF saves image in PDF format, which gives the user more options for using the digitized image.

Advice! If your device has scanned an image with black margins, you can crop them using a graphics editor.
Image scanning devices from competing manufacturers Canon and HP have distinctive features, which are determined by the desire to simplify the user’s work as much as possible.
To digitize images using Canon devices (Pixma MP250, i-SENSYS MF 4410, etc.), it is recommended to use a proprietary program Canon. It offers a number of interesting features for scanning, copying and editing documents.
For greater comfort in working with HP equipment (Laserjet Pro M1132, DeskJet GT5820, etc.), you should install the proprietary application HP Scanner Utility. It has many settings for using the scanner; images are also digitized using this program. And for devices released after 2010, there is an application "HP Solution Center", allowing you to scan, change settings, save images in different formats online.
The following problems occur most often when scanning documents.
To make the device last as long as possible, you need to follow simple recommendations.
In conclusion, the main points should be emphasized. So, scanners or MFPs are used to scan images onto a computer. The latter are universal devices: in addition to digitizing documents, they provide the ability to make a photocopy, print information from a PC, etc., depending on the functional features. To use the scanner's functionality, you need to connect the device to your computer, install drivers, and then, according to your needs, download special software for working with the device.
Printer KYOCERA ECOSYS P3045dn on Yandex Market
Printer KYOCERA ECOSYS P2040dw on Yandex Market
HP Color LaserJet Enterprise M553n Printer on Yandex Market
Printer Canon i-SENSYS LBP212dw on Yandex Market
Printer KYOCERA ECOSYS P5026cdw on Yandex Market
The development of digital technologies and accompanying methods of storing and transmitting data has made it possible to abandon various paper documents in favor of their electronic analogues. This turned out to be extremely convenient. Now you can scan the document you need and instantly send it by email anywhere to any recipient connected to the Internet, without leaving your home or office. Naturally, for this you need to know the methods and be able to create scans of documents.
Let's look at available ways to create scans of documents at home using available technical means and gadgets.
How to scan a document using a scanner
A scanner, in fact, as its name suggests, is a device specifically designed for scanning documents. Making scans using a scanner is very easy and simple.  The described algorithm may differ depending on the specific scanner model and its software.
How to scan a document without a scanner
Using a scanner you can obtain digital copies of documents of very high quality. But you may simply not have it at the right time, and knowledge of how to scan a document without a scanner will come in handy here. At its core, any scan is a digital image of a document. Therefore, you can use any digital camera to create a scan.

It would be better if it was a good SLR camera. To improve the quality of your digital copy, you can use the Macro photography, if it is present in your Camera. In most cameras it corresponds to the image of a flower on the mode switch. In this case, you will get a picture in which even the smallest details will be clearly visible.

Distortions that occur at the edges of the document, due to the structural features of the lens, can be trimmed in Photoshop. Along the way, it usually makes sense to increase the contrast of the image, especially if the photo was taken in low light conditions.
Modern smartphones also have cameras that allow them to be used to create scans. Point your smartphone camera at the document and using zoom in and out (digital Zoom), find the focal length at which the document will have better clarity. Take a photo, or better yet, several from different distances, so that you can then choose the best quality one. If your smartphone is connected to the Internet, then immediately after receiving the scan you can send it to the desired recipient by email.

Scans created using a digital camera and especially a smartphone will be inferior in quality to similar documents obtained using a real scanner, but this is compensated by the greater speed and versatility of this method, since its implementation does not require a bulky scanner.